- Clothing Patterns 101
- Pant and Shorts Styles
- Pleated Pants
How to Draft a Pleated Pant Pattern
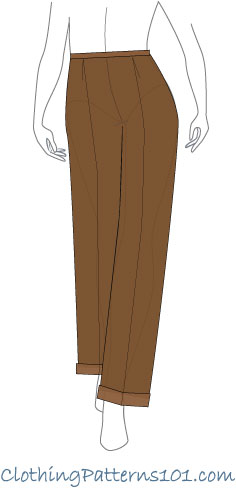
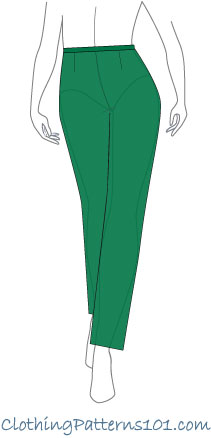
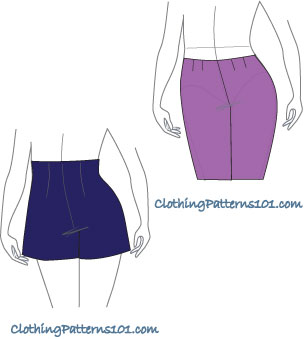
A pleated, trouser-style pant is a classic look. Katherine Hepburn made headlines wearing menwear-styled pleated trousers back in the day, when proper ladies only wore skirts and dresses! In the 70's, Diane Keaton wore them in "Annie Hall". Yes, I'm showing my age, but I love anything vintage, and every style comes back around from time to time.
And adding a pleat to your pants pattern isn't as hard as you might think!
Before you create these pant styles, you'll need a well-fitting pant block. You can create your pant block using a commercial pattern, or by drafting it from your own measurements. Drafting can be a bit complicated, but Craftsy's course, Patternmaking + Design: the Pants Sloper will walk you through it.
The pleated trouser looks great with a nice blouse and heels or flats. It's a polished look, and it's classic style for women's dress pants that is always appropriate (even when it's not "in fashion").
We'll be adding a bit of fullness through the upper hip, and replacing the darts with pleats. This doesn't make the pants loose or oversized, it just makes the fit a bit more relaxed through the upper hip.
The leg shape remains the same as the block. If you choose to alter the leg shape as well (adding a pleat to a tapered or flared leg, for example), add the pleat before changing the leg shape.
Drafting the Pleated Pant
You'll be adding the pleat at the front leg only, so no changes need to be made to the back pant pattern (unless you also change the leg shape - but do that later!!)
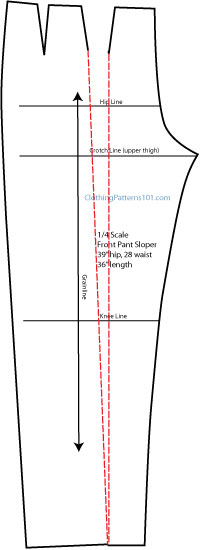
Draw a line from the bottom of the pleat to the hem (the dart closest to the front crotch curve, if your block has more than one).
Cut (slash) along this line, but do not cut through the bottom of the pattern. Leave about 1/8" attached at the bottom - this just makes it easier to keep your pattern together when you spread the pieces. (if you accidentally cut through, don't worry about it!)
The 2" opening at the waist becomes the pleat.
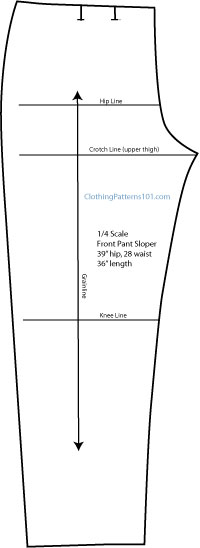
When you trace your slashed pattern onto fresh paper (or just tape fresh paper behind the opening to close it up), mark the pleat as I have here - 2 short marks that indicate the width of the dart.
When stitching the pant, you'll fold the pleat, matching the 2 marks, and baste across the top to hold the pleat in place.
The pleat can be placed with the folded edge facing toward the center seam, or away from the center seam (away from center is the most common placement).
If your block only has one front dart, then you're done!
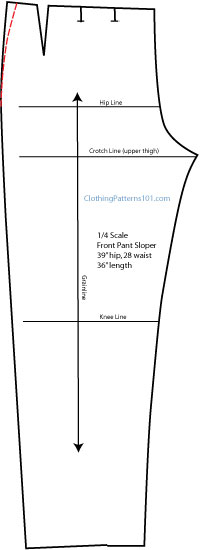
If you have a second dart, like the sketch, you can eliminate that dart (you don't really need it).
Just re-shape the side seam to account for the width of that dart (the red dashed line near the waist).
After re-shaping the side seam and eliminating the second dart (fill it in with paper, as you did with the slashed opening), your final pattern will look much the same as the one, above.
Once you're comfortable with how to add a pleat to your front pant, the variations are endless!
You can add 2 small pleats instead of just one (per leg). If your block has 2 darts, make each one a pleat. If you only have one dart, follow the directions, above, for the first dart, then simply draw another line and repeat the process for a second pleat (set the second pleat about 1" from the first one, toward the side seam).
Then, if you want to taper or flare the leg, do that after adding the pleats. And remember, changes to the leg shape must be done to both the front and back leg!
Adding a cuff
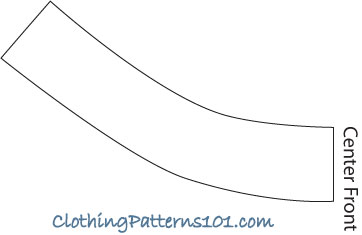
For a truly menswear-styled trouser, a cuff adds a bit of classic style.
You'll need to add a hem allowance (along with seam allowances) whether you add a cuff or not; the sketches below illustrate the cuff option.
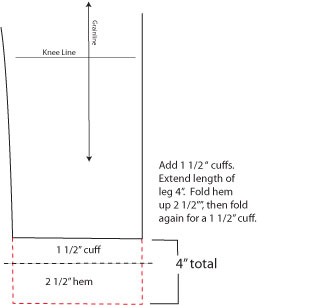 |
First, the math! I'm showing a 1 1/2" cuff. That's generally a nice size, especially for a light-weight pant. You'll be adding a total of 4" to the bottom of the pant, so allow enough paper (or tape on another piece)! Draw a line parallel to the bottom of the pant, 1 1'2" below the existing hemline. That's the depth of the cuff. Draw another line 2 1/2" below the first line - that's your fold-back, which is both the visible (exterior side) of the cuff, and the hem inside the leg (this allows a 1" hem, so the cuff will cover the stitching). |
|
Once you've drawn the lines, you can fold the paper to see how the cuff works. This is also a good technique for ensuring that your paper pattern is accurate, in the event the pant leg isn't perfectly straight. Cut around the pant leg about 1/2" from the seam allowance (It's easiest to add the seam allowance before doing the cuff). First, fold the paper UNDER at the 2 1/2" hem. (marked "1st fold") Then, fold UP at the "2nd fold" line. This shoiuld give you an idea of the depth of the cuff. There will also be 1" extending below the folds - that is the actual hem, which you will fold back and stitch (in the fabric). NOW you can cut along the seam allowance. You might see a slight "wave" to the line when you unfold it - that's OK; it just means your leg might taper just a bit. |
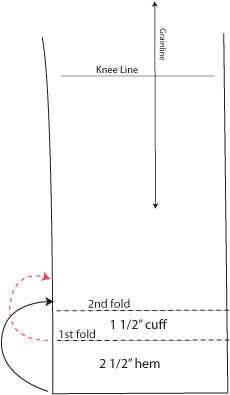 |
And that's your cuff! It can be a bit confusing to work out the math, but you can also just allow plenty of paper at the bottom of your leg and keep folding until you have a depth you like.
This page shows how to draft a pant pattern using your pant block. Remember to finish your pant with hems and seam allowances!
More Pant Styles
|
More Waist Treatments
Return to Clothing Patterns 101 Home Page
ClothingPatterns101.com does not sell the personal information of its users to anyone, ever.
