- Clothing Patterns 101
- Necklines and Collars
- Convertible Collar
The Convertible Collar
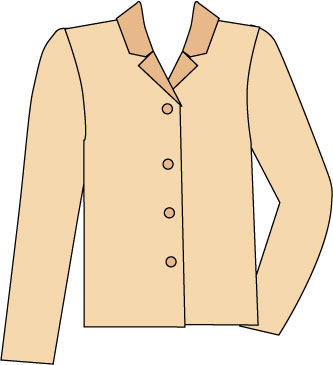
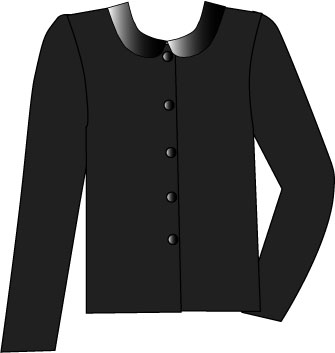
The convertible collar offers a bit more structure to a shirt or blouse than the Peter Pan, but is not as tailored as a banded shirt collar. It can be worn open or closed (hence the name), and looks very nice in a contrast fabric.
When worn open, the front opening creates a lapel, giving the blouse a tailored look without the intricate stitching involved in a fully tailored shirt.
The opened collar with lapel creates a tailored, almost jacket-like opening. It sits open much more elegantly than a traditional, tailored shirt collar, yet does not appear too casual.
It can, however, be quite casual. It's the collar used on camp shirts, often made of brightly colored prints (Hawaiian shirts use the convertible collar, for example).
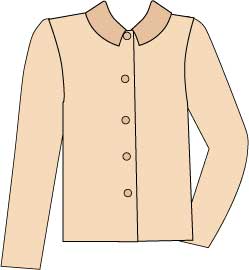
Worn closed, it looks more like a standard shirt collar.
Unlike a more simple collar like the Peter Pan, this collar does not lay flat against the shoulders.
The relatively straight shape of the collar allows it to roll and stand up a bit around the neckline, somewhat like a dress shirt collar. But there is no collar stand - this collar is much easier to draft and to stitch!
Drafting the Convertible Collar
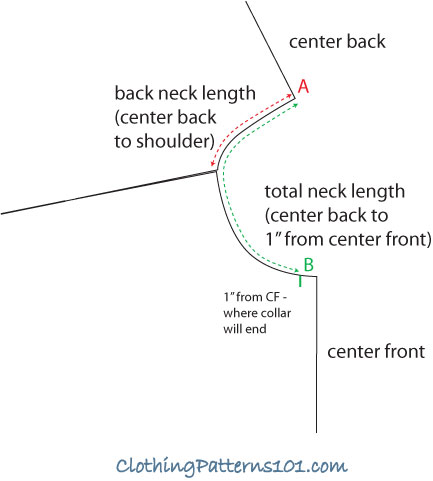 |
There are quite a few steps to making this collar, but just follow the sketches and it will make sense. Start by tracing the neckline area of your blouse block and placing a mark 1" from the center front (the mark is in green, at left, and labeled point B). This is where the collar will end; it does not overlap at center front. This will also help to create the lapel when worn open. |
Then measure the total neck from the center back (A) to the marked point B (the green dashed line). Record the measurement.
Measure the back neck from point A to the shoulder (the red dashed line) and record that measurement, too.
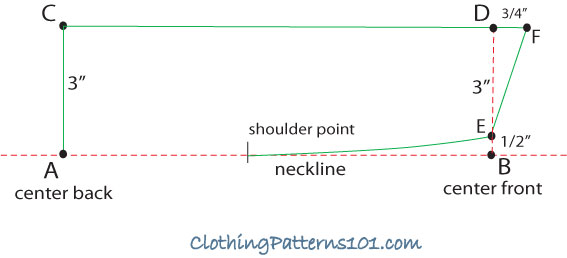
- On a separate piece of pattern or craft paper, draw a line (AB) that is the length of the total neck measurement from A to B (the green dashed line from previous sketch).
- "A" will be the center back. Measure, from "A", the length of the back neckline (per the red dashed line in previous sketch) and make a mark. This will become a notch that identifies the shoulder seam.
- Draw a line perpendicular (at a 90 degree angle) from A to "C". This is the width of your collar. Our example is 3", but that's up to you.
- Draw a similar line from "B" to "D" (3" up, squared to line AB). Then draw line CD (the top edge of your collar).
- Mark a point 1/2" up from point "B" along BD (point E). Draw a gently curved line from that point back to point "A". This is your new neckline.
- Mark another point 3/4" from point "D", along CD (point F). Draw a line between the two new points; this is the front edge and the point of the collar.
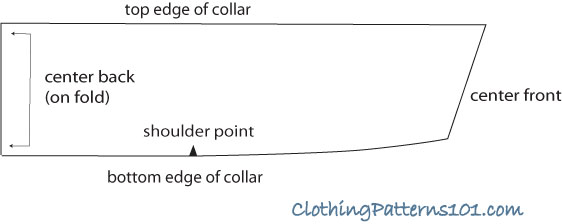
The final pattern will look like the one above, with the collar cut ON THE FOLD at center back. Be sure to mark your shoulder points; it's much easier to sew correctly with markings.
This collar, you'll notice, does not follow the shape of the neckline and is, in fact, almost straight. That is what allows the collar to fold nicely and stand up near the neck, rather than laying flat against the blouse.
One thing to note: As a truly convertible collar with the option to wear it open or closed, you will have a button and buttonhole at the neck. The buttonhole will be visible on the lapel when the collar is worn open. Make it neatly!
There are several more steps to making this pattern than a simple Peter Pan, but it's not hard, and it looks so nice!
More Collars and Necklines
Return to Clothing Patterns 101 Home Page
ClothingPatterns101.com does not sell the personal information of its users to anyone, ever.
