- Clothing Patterns 101
- Using the Fitting Pattern
- Full Bust Adjustment
How to Do a Full Bust Adjustment
Most commercial patterns are designed for a B-cup. Fitting patterns usually offer options for an A and C cup as well; however, if you are larger than a C-cup, you'll need to do a full bust adjustment (FBA) to your pattern for proper fit.
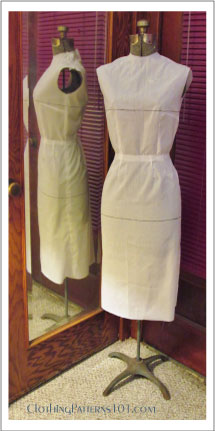
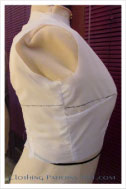
Stitch up your bodice muslin and try it on; you'll have to mark how your bust point differs from the pattern, in terms of height and depth. Be prepared to make a new muslin for final tweaking after making the adjustments, below!
FBA Step 1
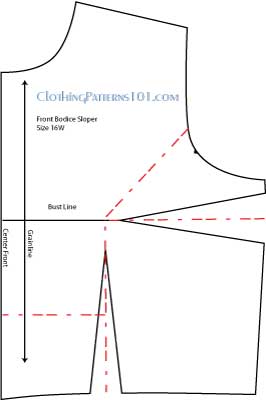
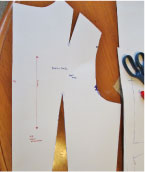
The first step is to draw some lines to bisect your bodice. You'll slash along these lines to spread the bodice for more room at the bust.
First, draw a line from the armhole to the bust point, then down through the waist dart (follow the dashed red lines in the sketch).
Draw another line perpendicular to the vertical one, to the center front.
Finally, draw a line bisecting the side dart.
FBA Step 2
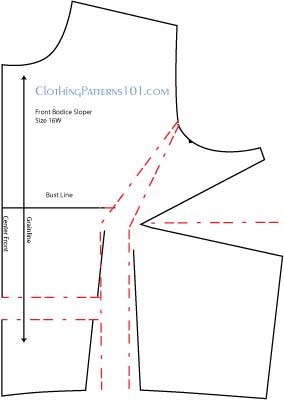
Next, cut along these lines to spread the bodice.
Cut along the line from the waist UP to the bust point, then over to the armhole. Do NOT cut THROUGH at the armhole; keep about 1/8" intact to pivot your pieces, but do not completely separate them.
Next, cut along the horizontal line through the side dart, ALMOST to the bust point. Again, don't cut all the way through; this is another pivot point.
Finally, cut along the horizontal line from the center front to the waist dart.
FBA Step 3
Spread the bodice apart as shown, above.
Start by spreading along the line from the waist to the armhole. This will add width through the bust (and the waist), forcing the armhole upwards. This does NOT affect the size of the armhole, so don't worry about the sleeve cap.
This also forces the lower side bodice downwards, making the bodice a bit longer. The side seam will not be affected (the side dart is larger, and when that is sewn, the side seam is the same). But the "legs" of the waist dart are spread apart and pushed down.
Now, lower the small section below the horizontal cut at the center front so that the bottom seam line is even. This lengthens the front, preventing the front of the bodice from "hiking up" above the natural waist (another accommodation for the larger bust).
FBA Step 4
|
|
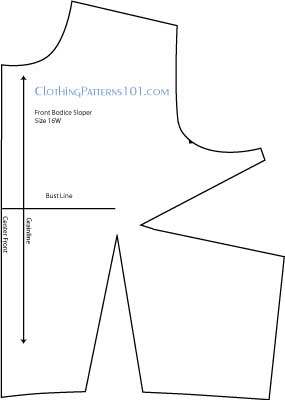
Finally, tape paper behind the pattern to fill in the gaps and re-connect your waist dart (which was pulled apart) and center front line. You'll notice that the bust point is now lower than it was previously (it was in line with the marked bust line; it is now about 1" lower). When re-connecting the waist dart, make sure that the point is lower, too. How much you'll need to adjust in the process (how much to spread and lower the bust point) will depend upon your initial fitting of your muslin. |
After making these adjustments to the pattern, cut another muslin front and try it on. You may need a few more minor alterations to fit the bodice, but the FBA will get you much closer to the perfect fit!
Need More Help with Fitting Issues?
The examples on this site reflect MY fitting issues and how I resolved them. Your body is likely very different.
But, since this is a site about the mechanics of making patterns and not specifically about fitting, I'm not going to address other fit issues here. And believe me, there are others who can address this issue better than me.
Any of the books listed below will help you achieve good fit. You can use the techniques on any pattern; but why make the same corrections over an over again? Apply the principles to your block, and the fit corrections YOU need will be automatically built in to every pattern you make!
I can recommend any of the following books and an online courses to help you achieve good fit, no matter what your size or shape. I own or have used almost all of the books on this list, and have been pleased with how they address fit problems.
And there are a couple that address plus sizes, too!
Click on the links below to go to the item in Amazon. As an Amazon Associate I earn from qualifying purchases. This helps to keep this site free for your use. You are free to search Amazon for these or other similar items without using the affiliate links on this page.
I am also an affiliate of Craftsy, and receive a small commission on their classes. I have taken several Craftsy classes, and highly recommend them. Click on the text links, below, to find the classes at the Craftsy site. You may need to become a member to access the classes.
- Pattern Fitting With Confidence - A very useful book written by the late Nancy Zieman, host of the TV series "Sewing with Nancy". She provides a straightforward, down-to-earth approach to sewing and fitting. Very user-friendly.
- The Complete Photo Guide to Perfect Fitting - I love this book!!! So wonderfully illustrated with photos, using commercial patterns to demonstrate the pattern alterations. It addresses almost any fit problem you might have. So easy to understand and follow!
-Sewing for Plus Sizes - Creating Clothes that Fit and Flatter - A great book for Plus sizes! As a woman gets larger, it's not just the measurements that change - our overall proportions shift, too. This book addresses the different body types and proportions you commonly see in larger women. Truly helpful for larger women.
- Fitting Solo from Measurements to Muslin - This class shows you how to take your own measuements (fundamental to creating your block), and then make adjustments to the pattern (make these changes to the FITTING pattern for a perfectly fitted block!). You will also make a muslin, as I have described in the block-making process. It's kind of like the instructions on this site, but with video demonstrations!- Pattern Alterations: Fixing Fit Issues - This course covers pattern alterations to correct a gaping neckline, sleeve issues (including fitting the bicep), and making adjustments to the abdomen and seat areas.
- Plus Size Pattern Fitting and Design - As a size 16 (and only 5'2" tall), I qualify as a Plus size. And I've taken this class with Barbara Deckert - it is FABULOUS! Aside from the fitting tips, she also explains the style lines and silhouettes that are flattering to the Plus size figure. I highly recommend this class!
Step-by-Step: Making and Fitting Your Block
Return to Clothing Patterns 101 Home Page
ClothingPatterns101.com does not sell the personal information of its users to anyone, ever.
