- Clothing Patterns 101
- Skirts and Dresses
- Sheath Dress
How to Draft a Sheath Dress
A sheath dress is, essentially, your block dress pattern - but without the waist seam.
It's so simple to draft!
This page shows how to draft a dress pattern using your dress block. Remember to finish your dress with hems and seam allowances!
To draft the sheath, you just join the bodice and skirt of your dress block into one garment. There is no waist seam.
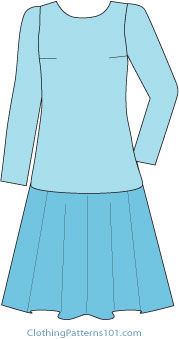
In this version, I have added a high waist as a styling detail, but if you want a basic, fitted dress in a solid color, you can certainly do that, too.
The high waist is just a style line, used for color-blocking. I like the dark bottom and white top.
The waist seam serves no other purpose on this dress, so you can eliminate it and make the dress in one color.
How to Draft the Sheath Dress
Start with your bodice and skirt block patterns.
Line them up at the waist, with the center front a continuous line. The side seam may or may not line up at the side.
You'll be joining the bodice and skirt, and eliminating the waist seam. So, you'll have to combine the 2 skirt darts into one dart, which lines up with the bodice waist dart.
The steps for the back are the same as the steps for the front, so our illustrations only show the front of the dress.
To make the waist dart for the dress, the skirt darts will be combined into one dart that lines up under the bodice dart.
The dress dart is a diamond shape.
This isn't difficult. Just draw a dart that starts at the bottom of the bodice dart (the same width as the bodice dart), and the length of the skirt dart. You're moving the skirt darts over to sit under the bodice dart, that's all.
If the dress block felt a bit too tight for daily wear, you can make the final dart a little bit narrower than the original darts (there are 2 rows of dashed lines in the illustration to show this). That will give you a bit more room at the waist.
Smooth out the side seam a bit; you'll probably have a bit of a point where the bodice and skirt meet; smooth that out with a curved seam. If your skirt and bodice don't meet at the waist, follow the wider of the two so that the dress fits comfortably.
If you want a solid color dress, you're done!
But if you want the high waist, like the dress shown at the top of the page, you have one more step.
Draw a line from the side seam to the center front, where you want the waist to fall on your body. In the illustration, I have drawn the line above the waist seam; in the dress above, it sits a bit lower and parts of the dart show in both the white and the blue sections of the dress. This is just a style line, so place it where ever it's pleasing to you.
You'll notice that the line is curved. This is because of the bust dart, which forces the top section down at the side. Draw your line parallel to the bottom of the dart, then continue to the center front. When the dart is sewn, the seam will be straight (trust me on this one!)
On the back, the line will be straight from side to center back, since there is no horizontal dart.
Cut along that line, and you have an upper and lower dress! Just cut each part in a different color, and you'll have a high waisted sheath, as shown above.
By the way, do you know the difference between a sheath and a shift?
A shift is a very similar dress, but it's not as close-fitting.
You would draft a shift pattern in the same manner, but just don't use the waist darts (I still use the bust darts for good fit).
A shift is also more likely to flare more at the hem, like the A-line shown at left.
If you can draft a sheath, you can draft a shift!
Before you create these dress, skirt or blouse styles, you'll need a well-fitting dress block. You can create one from a commercial pattern, or draft your dress block using your own measurements.
Once you have your fitted block, create an almost infinite variety of styles using the in-depth tutorial "A Beginner's Guide to Designing Skirts, Blouses and Dresses". Check it out now!
What's the Next Step?
All of the dresses shown above require a center back zipper, so your back pattern will need a seam allowance to accommodate the zipper (22" is a good length). The front pieces will be cut on the fold.
Decide if you want to add sleeves, and what style of sleeve. If you use a blouse sleeve, remember to lower the armhole of the dress, just as you did on the basic blouse. You'll have a bit more room to move, and you can use your blouse sleeve to draft your dress sleeve.
You can also choose a different neckline or add a collar, too.
Then finish your pattern with a hem, seam allowances, and markings, and you're ready to make your new dress or blouse!
More Skirts and Dresses
Return to Clothing Patterns 101 Home Page
ClothingPatterns101.com does not sell the personal information of its users to anyone, ever.


